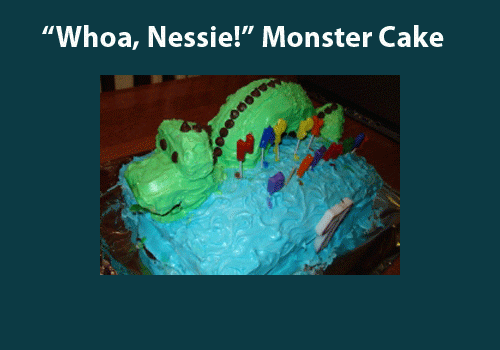
It all started with a birthday party, a Bundt cake, and a 7-year-old with a wild imagination. An ordinary layer cake just wouldn’t do for him; neither would a store-bought confection with plastic figurine toppers. He wanted to capture the Loch Ness Monster from the depths of the sea, and he wanted it in cake. As a supportive older sister with a penchant for baking, I had to meet his challenge. My only dilemma was figuring out how to do it.
Fondant would be the obvious route, but fondant and I are not friends. Sure, I’ll smile as others stare in wonder of its smooth, flawless glow, like the Hills girls do with Heidi’s “structured” new face, but you will not see me dashing off to transform my cakes into fondant-ensconced masterpieces. At least not until I find a fondant that actually tastes like something other than a gummy wedge of lard. (Oooh, harsh!)
I like my birthday cakes with character, even if it means they’re a little flawed and lopsided. I made this cake a whopping three years ago (Fun fact: those first two paragraphs were written waaay back then, when Collegiate Cook first launched — hence the dated Hills reference. I couldn’t lose it though!), but it was so easy to make I couldn’t resist sharing it with you.
If you make it, be sure to send me a pic!
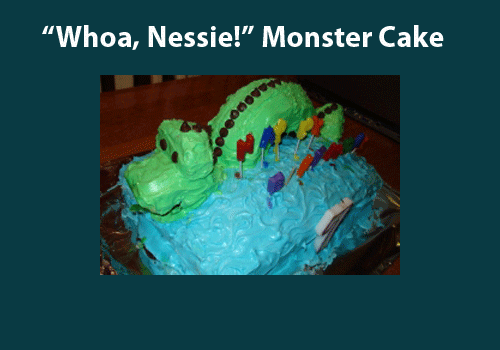
“Whoa, Nessie!” Loch Ness Monster Cake
Serves 6-8 hungry little monsters
Utensils required: mixing bowl, measuring cups, spoonula, oven mitts, Bundt pan, 9″x13″ pan, butter knife (for spreading frosting), toothpicks, serving dish (or just turn a baking sheet upside down and cover it with tin foil)
Ingredients:
1 cake mix (and eggs/oil/butter, according to box’s instructions; for some reason, box mixes hold up better when making sculpted cakes)
Cooking spray or butter for greasing pans
2 cans vanilla buttercream frosting (or cream cheese frosting)
1 bottle blue food coloring (you’ll only need a few drop of each)
1 bottle green food coloring
1/2 cup semisweet chocolate chips
Steps:
- Follow cake mix directions to prepare batter and preheat oven as directed. Grease bottom and sides of 9″x13″ pan and Bundt pan. Pour batter into Bundt pan first, filling it no more than 3/4 of the way up, then pour remaining batter into 9″x13″ pan.
- Bake according to package directions. The Bundt cake should take about 35-40 minutes. Insert a toothpick into the cake, and if it comes out clean, the cake is ready. Since oven cook times and Bundt pan sizes vary, I recommend checking up on it after 30 minutes, and every 5 or so minutes after that until it’s ready. Nothing’s worse than a scorched, dry cake.
- Once it’s ready, remove the cake from the oven and let it cool completely, about 20-30 minutes. In the meantime, prepare the frosting. In one can, pour 4-5 drops of blue food coloring. In another, pour 4-5 drops of green. Use a butter knife to stir the colors, adding a drop or two at a time until you have the hues you’d like.
- Cut a strip of cake off the narrow side of the 9″x13″ piece that’s roughly the width of the Bundt cake. This will be used to make the head of your monster. Set it aside for now, and move the remaining 9″x13″ slab of cake to a serving dish (it’s probably now more like a 9″x11″).
- Put scraps of parchment paper (or clean, regular paper) under the edges of the cake to keep the frosting from dripping all over the dish. Cover the 9″x11″ with blue frosting, using the knife to swirl wave-like ridges and texture onto it.
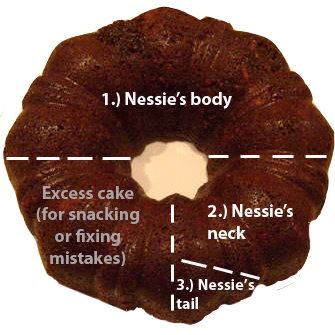
- Cut one semicircle from the Bundt pan — that will be the looping back of the monster. Set aside. Cut the remaining half in half — set one piece aside in case you make a mistake or are in need of a snack mid-decorating. With the other piece, you’ll cut out a triangle to form the tail, and the remaining part will be the neck/mouth (see diagram).
- Insert two toothpicks halfway into both ends of the semicircle (AKA Nessie’s body), then stick it onto the center of the 9″x11″ cake. You’ll frost Nessie’s body later. Do the same for the head and tail. Use additional toothpicks if necessary to keep the pieces from falling over. You may want to shorten the neck so it’s less likely to wobble.
- Use the 2″ piece you cut from the 9″x13″ to carve the top of the head. Stick two toothpicks in the bottom of the cake, and secure it onto the neck/mouth piece (which should resemble an upside-down L jutting out of the 9″x11″ base of the cake). Frost all of Nessie with the green frosting, being careful not to drip green frosting into the blue “water” frosting. If you do, just swirl some excess blue frosting over it to cover the green splotches.
- Create a line of chocolate chips down the back of Nessie to form her spikey scales. Stick two chocolate chips pointy-side down on the mouth piece for nostrils, and do the same on the head to create her eyes.


