You followed the recipe exactly, yet those cinnamon rolls would be best used as doorstops. And that steak? Let’s just say the image on Epicurious didn’t show it as a dull, lifeless gray color when it’s ready to eat.
Don’t write yourself off as a horrible cook. You just don’t know the secret language of recipes.
They don’t require ‘reading’ so much as decoding. The words are English, sure, but it’s the way they’re written — particularly the order they’re written in — that provides you with subtle cues for perfecting a dish. Thankfully, joining this secret society of recipe decoders is easy. I’ll break it down using tips I’ve learned in Marge Perry‘s Food Writing class.
How to Decode a Recipe:
Rule No. 1: Read the entire recipe first
Nothing’s worse than preparing half a meal and realizing that it requires some gadget you don’t have or that you weren’t supposed to dump all the brown sugar in the brownie batter. It sounds tedious, but understanding all the steps before you touch the ingredients saves plenty of frustration later.
Rule No. 2: Respect commas in the ingredients list
As Marge showed us, “1 cup sliced strawberries” and “1 cup strawberries, sliced” mean two totally different things.
What?
Yes, re-hinge that pretty little jaw. “1 cup sliced strawberries” means that you should slice the strawberries then measure out a cup of them to use. “1 cup strawberries, sliced” means that you should measure a cup of strawberries, then slice them. That may seem insignificant, but failing to respect the comma can result in you adding the wrong amount of that ingredient to your dish. In some cases, it could throw off the entire taste — and sometimes, texture — of the dish.
Rule No. 3: Perfect your mise en place
“Mise en place” — French for “everything in place” — is commonly used in cooking to refer to measuring all of the ingredients and having them ready before you start any of the recipe’s steps. It’s an easy way to keep the cooking process running smoothly, since you won’t have to risk burning the roux while you rush to chop scallions; they’ll already be ready to go.
Plus, like the aforementioned sliced strawberries show, you may have some baby steps to take (usually cutting things up) before you even begin cooking.
Rule No. 4: Organize according to the ingredients list
Fun fact: Ingredients are listed in the order you’ll need them. Arrange your ingredients around you in a similar fashion so they’ll be easy to grab as you prepare the dish.
Rule No. 5: Understand measurement shorthand
tbsp = tablespoon
tsp = teaspoon
oz = ounce
c = cup (though most people just spell it out; it’s only two extra letters after all!)
divided = As in, “1 cup sugar, divided.” This means that the ingredient is used in different steps of the recipe. This is often the case with sweets, where you’ll use some sugar for the batter and reserve some for the frosting. Usually, the recipe will tell you how many portions it should be divided into. If it just reads “divided,” separate it in half.
The Recipe: Gooey S’mores Sandwich
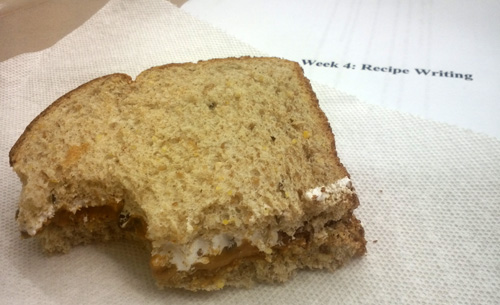
After learning the ins and outs of recipe writing (and the many ways in which I’ve failed at it!), Marge had us concoct a peanut butter sandwich using a slew of random ingredients. We had just a few minutes to brainstorm our recipes. Since I have an irrepressible sweet tooth, I opted for a dessert sandwich. I only wish I had a toaster handy so I could’ve really enjoyed it s’mores-style.
Kitchen gadgets needed: butter knife
Ingredients (yields 1 sandwich):
- 3 teaspoons creamy peanut butter
- 1/2 of a 1.55-ounce milk chocolate bar
- 2 slices of multigrain (or cinnamon raisin!) bread
- 3 teaspoons marshmallow creme
Time commitment: 4-5 minutes
Steps:
- Lightly toast bread. While it toasts, crumble the chocolate and stir it into the peanut butter.
- Spread the peanut butter mixture on one side of a slice of bread. Spread the marshmallow creme on one side of the other slice.
- Assemble sandwich. Revel in its creamy, gooey texture.

